
Welcome to the Yamaha MG12XU manual! This guide provides a comprehensive overview to help you understand and operate the mixer effectively, unlocking its full potential for professional audio production.
1.1 Overview of the Yamaha MG12XU Mixer
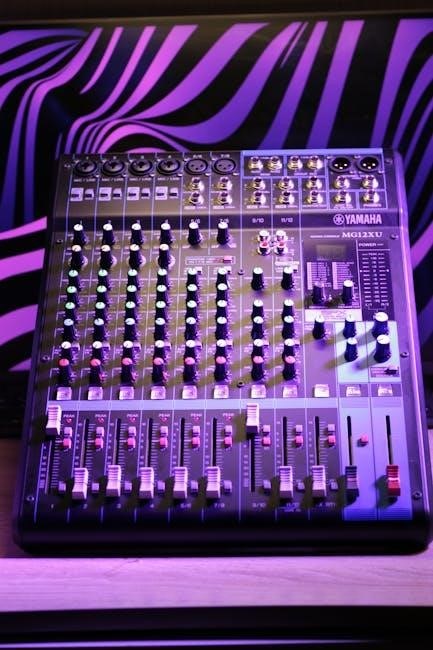
The Yamaha MG12XU is a 12-channel analog mixer designed for professional audio applications. It combines high-quality preamps, versatile EQ, and built-in effects for exceptional sound control. With its compact design, it suits live performances, recording, and installations. The mixer features D-PRE Class-A preamps, 4-group buses, and a USB interface for direct recording. Its durable construction ensures reliability, while the intuitive layout simplifies operation. Whether for musicians, sound engineers, or AV professionals, the MG12XU offers flexibility and precision, making it a versatile tool for various audio needs.
1.2 Importance of Reading the Manual
Reading the Yamaha MG12XU manual is essential for understanding its features, optimizing performance, and troubleshooting issues. It provides detailed insights into proper setup, operation, and maintenance, ensuring safe and effective use. By familiarizing yourself with the manual, you can unlock the mixer’s full potential, avoid common mistakes, and resolve problems efficiently. Whether you’re a novice or an experienced user, the manual serves as a comprehensive guide to achieving professional-grade audio results and maintaining the mixer’s longevity.
Key Features of the Yamaha MG12XU
Discover the Yamaha MG12XU’s key features, offering a versatile, professional-grade 12-channel mixer with robust build quality, ensuring durability and portability for various live and studio applications.
2.1 Channels and Input Types
The Yamaha MG12XU features 12 channels, offering flexibility for various audio sources. It includes 6 mono channels with XLR combo jacks for microphones or line-level inputs, and 4 stereo channels with TRS jacks for instruments or playback devices. The mono channels are equipped with high-quality D-PRE preamps, ensuring clear and detailed sound reproduction. Additionally, the mixer supports a wide range of input types, from dynamic and condenser microphones to keyboards, guitars, and other electronic instruments; This versatility makes it ideal for live performances, recording sessions, and multimedia applications, catering to both professional and amateur audio engineers.
2.2 Onboard Effects and Processing
The Yamaha MG12XU features an impressive suite of onboard effects, including reverb, delay, chorus, and more, to enhance your audio without external gear. These effects are easily accessible via the mixer’s intuitive interface, allowing you to add depth, ambiance, or creative flair to your sound. Additionally, the mixer includes processing tools like compression and EQ, enabling precise control over dynamics and tone shaping. With these built-in capabilities, you can achieve professional-grade mixes and tailor your sound to suit any performance or recording scenario, making the MG12XU a versatile and powerful tool for audio engineers and musicians alike.
2.3 Built-In USB Interface
The Yamaha MG12XU features a built-in USB interface, enabling seamless audio recording and playback between the mixer and a computer. This interface supports high-resolution audio, ensuring professional-grade sound quality. It is compatible with major DAWs, making it ideal for studio and live recording applications. The USB connection also allows for convenient firmware updates and direct integration with external devices. With its intuitive design, the USB interface simplifies the recording process, offering reliable connectivity and versatile functionality for musicians, producers, and sound engineers. This feature enhances the mixer’s versatility, making it a valuable tool for both live performances and studio environments.
2.4 Durable Construction and Portability
The Yamaha MG12XU is built with a robust metal chassis, ensuring long-lasting durability even in demanding environments. Its compact, lightweight design makes it easy to transport, perfect for gigging musicians and engineers. The mixer features a protective coating on the internal components to withstand humidity and temperature changes. Additionally, the optional carrying case provides extra protection during transit. These design elements ensure the MG12XU remains reliable and portable, making it an excellent choice for both studio and live sound applications.

Setting Up the Yamaha MG12XU
Setting up the Yamaha MG12XU involves careful preparation, connecting devices, and configuring settings to ensure optimal performance for your audio needs.
3.1 Unboxing and Initial Inspection
When unboxing the Yamaha MG12XU, carefully inspect the mixer and accessories for damage. Verify all components, including the power cord, USB cable, and user manual, are included. Check the mixer’s surface for scratches or dents. Ensure all knobs, faders, and buttons are intact and functioning. Familiarize yourself with the layout before powering on. Handle the mixer with care to avoid damage. Store the original packaging for future use or transportation. A thorough inspection ensures a smooth setup process and prevents potential issues down the line.
3.2 Connecting Microphones and Instruments
To connect microphones and instruments, start by identifying the appropriate inputs. Use XLR cables for microphones and TRS or TS cables for instruments. Plug microphones into the XLR inputs on channels 1-4. For instruments, use the TRS jacks on channels 1-4 or the dedicated instrument input on channel 2. Ensure all connections are secure to avoid noise or signal loss. If using condenser microphones, enable 48V phantom power via the switch on the rear panel. Adjust the gain knobs to optimize signal levels, and test connections by speaking into microphones or playing instruments to confirm audio is routing correctly through the mixer.
3.3 Setting Up External Devices and Effects
Connecting external devices and effects to the Yamaha MG12XU enhances its functionality. Use the AUX sends to route signals to external processors like reverb or delay units. Ensure all cables are securely connected to the appropriate TRS or XLR ports. For MIDI devices, use the MIDI IN/OUT ports to synchronize effects or control external gear. Labeling cables and organizing connections can prevent signal loss or interference. Test each setup to confirm proper operation before live use. This setup allows for seamless integration of external effects, expanding the mixer’s versatility for professional audio applications.
3.4 Powering On and Basic Configuration
Before powering on, ensure all connections are secure. Plug in the power cord and switch on the mixer. The power LED will illuminate, indicating it’s ready for use. Perform a quick audio test by playing a sound through a connected device. Adjust the master volume to a safe level. Familiarize yourself with the control layout and default settings. Navigate through the channels, ensuring no unexpected noise or distortion. If using external devices, verify their integration. Finally, save your initial configuration as a scene for future recall. This setup ensures a smooth start for your audio mixing experience.

Operating the Yamaha MG12XU
Discover how to operate the Yamaha MG12XU with ease. Learn to navigate its intuitive interface, adjust levels, and utilize EQ and effects for polished sound production.
4.1 Understanding the Mixer Layout
The Yamaha MG12XU features a user-friendly design with clearly organized controls. The mixer is divided into channel strips, each containing input gain, EQ, and level faders. The master section includes the main stereo fader, aux controls, and effects send. LED meters provide visual feedback for output levels, while the pan knob allows for precise stereo imaging. The layout ensures intuitive navigation, with logical grouping of related functions. Familiarizing yourself with the mixer’s structure simplifies the mixing process, enabling quick adjustments and seamless operation during live or studio sessions.
4.2 Adjusting Levels and Faders
Adjusting levels and faders on the Yamaha MG12XU ensures optimal audio balance. Start by setting input gain using the gain controls, aiming for peak levels between -12dB and -6dB. Use the channel faders to adjust the overall volume of each input. The master fader controls the final output level to your speakers or recording device. LED indicators provide visual feedback for signal strength. For precise monitoring, use the pre-fader listen (PFL) switch to isolate channels. Always adjust levels gradually, listening carefully to avoid distortion. Properly balancing levels and faders is key to achieving a professional-sounding mix.
4.3 Using the EQ Section
The Yamaha MG12XU features a 3-band EQ on each channel, allowing precise tone shaping. The high band (10 kHz) brightens highs, the mid band (2.5 kHz) adjusts warmth, and the low band (100 Hz) enhances bass. Use the mid-frequency sweep to target specific tones. Adjust faders carefully to avoid overboosting or cutting. Apply subtle boosts for clarity or cuts to reduce unwanted frequencies. For vocals, enhance presence with a high boost. For instruments, use the mid to remove muddiness. EQ adjustments should be minimal to maintain natural sound. Experiment and trust your ears to achieve the desired tone.
4.4 Assigning Aux Sends for Monitoring
To assign aux sends for monitoring, locate the aux send controls on each channel strip. Adjust the aux level knobs to set the desired signal level for monitoring. Use the aux send switches to assign the signal to the aux buses (A or B). For pre-fader or post-fader operation, refer to the channel strip configuration. Route the aux outputs to your monitoring system, such as headphones or stage monitors. This allows performers to hear themselves clearly during performances or recordings. Ensure aux levels are balanced to avoid feedback or uneven sound. Properly assigning aux sends enhances monitoring accuracy and overall mix quality.
4.5 Navigating and Using Onboard Effects
The Yamaha MG12XU features a versatile suite of onboard effects, including reverb, delay, and chorus. To access these, press the FX button and use the navigation dial to select your desired effect type. Adjust parameters like level, time, and depth using the FX CONTROL knobs. Effects can be routed to individual channels or the main mix via the AUX SEND knobs. For monitoring, use the AUX returns to blend the processed signal. Experiment with different effects to enhance your sound, ensuring a polished and professional mix. This feature is perfect for live performances and studio recordings alike.

Advanced Features of the Yamaha MG12XU

The Yamaha MG12XU offers advanced features for professional audio production, including versatile effects, precise EQ controls, and seamless connectivity options, ensuring exceptional sound quality in various applications.
5.1 Using the USB Interface for Recording
The Yamaha MG12XU features a built-in USB interface, enabling seamless audio recording to your computer. Connect the mixer to your PC or Mac via a USB cable, and select the MG12XU as the audio interface in your DAW. This allows for high-quality digital audio transfer from the mixer’s stereo output or individual channels. The USB interface supports 24-bit/192kHz resolution, ensuring professional-grade recordings. Use the TO HOST switch to route audio directly to your computer for live or studio applications. This feature simplifies recording, making it ideal for musicians, producers, and live sound engineers seeking efficient and reliable audio capture.
5.2 Customizing Scenes for Different Applications
The Yamaha MG12XU allows you to customize scenes for various applications, ensuring quick setup for live performances, rehearsals, or studio recordings. Scenes store your mixer configurations, including fader levels, EQ settings, and effect assignments. This feature is ideal for switching between different band members, instruments, or audio sources seamlessly. You can recall scenes instantly, reducing downtime and enhancing workflow efficiency. Customizing scenes also enables you to tailor the mixer to specific venues or genres, making it versatile for diverse audio needs. Experiment with different setups to find the perfect configuration for your unique applications.
5.3 Integrating External Effects Processors
Enhance your sound by integrating external effects processors with the Yamaha MG12XU. Connect devices via aux sends or insert jacks to expand your effects arsenal. Use aux sends to route signals to external processors, then return them to the mixer. For individual channels, insert jacks allow direct processing before the mixer’s main circuit. This setup enables precise control over effects like reverb, delay, or compression. Ensure proper gain staging to maintain audio quality and avoid noise. Experiment with different configurations to tailor your sound, leveraging the mixer’s flexibility to create professional-grade audio productions.
Troubleshooting Common Issues
Identify and resolve common problems with the Yamaha MG12XU, such as audio distortion or connectivity issues, by following systematic diagnostic steps and practical solutions outlined here.
6.1 Diagnosing Audio Problems
Diagnosing audio issues with the Yamaha MG12XU involves checking connections, gain levels, and EQ settings. Ensure all cables are securely connected and free from damage. If audio is distorted, verify that channel gains and faders are set appropriately. Mute and unmute channels to isolate the source of the problem. Check the EQ section for unintended boosts or cuts. If issues persist, reset the mixer to its default settings or perform a factory reset. For persistent problems, consult the troubleshooting guide or contact Yamaha support for further assistance.
6.2 Resolving Connectivity Issues
Connectivity issues can disrupt your workflow. Start by checking all cables for damage or loose connections. Ensure USB and audio interfaces are properly plugged in. Restart the mixer and connected devices to reset connections. If using MIDI, verify MIDI channels and sync settings. For USB issues, reinstall drivers or update firmware. Test with different cables or ports to isolate the problem. Consult the manual or Yamaha support for specific error codes or advanced troubleshooting steps; Regularly updating firmware and drivers helps prevent connectivity problems. Always power on devices in the correct order to maintain stable connections.
6.3 Understanding Error Codes and Solutions
The Yamaha MG12XU may display error codes to indicate specific issues. These codes, such as “E01” or “E02,” relate to power supply problems or DSP malfunctions. Always refer to the manual for precise solutions. For example, “E01” may require checking the power cable or internal fuse, while “E02” could involve resetting the mixer or updating firmware. Regular maintenance, like cleaning controls and ensuring proper ventilation, can prevent many errors. If the mixer freezes, try resetting it by holding the power button for 10 seconds. Addressing errors promptly ensures optimal performance and extends the mixer’s lifespan.
Maintenance and Care
Regularly clean the mixer with a soft cloth, avoid harsh chemicals, and store it in a dry place. Handle with care to prevent damage and ensure longevity.
7.1 Cleaning the Mixer and Controls
Regular cleaning ensures optimal performance and longevity. Use a soft, dry cloth to wipe the mixer’s surface, paying attention to faders, knobs, and buttons. Avoid harsh chemicals or liquids, as they may damage the finish or harm electronic components. For stubborn dust or debris, lightly dampen the cloth with distilled water, but ensure no moisture seeps into openings. Clean one section at a time to prevent dirt from spreading. Use compressed air for dust in hard-to-reach areas. Never spray cleaning products directly on the mixer. Regular maintenance prevents grime buildup and ensures smooth operation of all controls.
7.2 Updating Firmware and Software
Regularly updating the Yamaha MG12XU’s firmware and software ensures optimal performance and security. Visit Yamaha’s official website to download the latest versions. Follow the on-screen instructions carefully to install updates. During the process, avoid disconnecting the mixer or turning it off. Once complete, restart the mixer to apply changes. Always verify the update’s success by checking the version number. For detailed steps, refer to the user manual or Yamaha’s support page. Keeping your mixer updated guarantees compatibility with new features and maintains its reliability for professional audio applications.
Mastering the Yamaha MG12XU will elevate your audio production. By following this manual, you’ll unlock its full potential and achieve professional results in various mixing scenarios.
8.1 Summary of Key Points
The Yamaha MG12XU is a versatile mixer designed for professional audio production. It features 12 channels, onboard effects, and a built-in USB interface for seamless recording. The mixer is durable, portable, and easy to set up, making it ideal for live performances and studio use. Key operations include adjusting levels, using the EQ section, and assigning aux sends for monitoring. Troubleshooting common issues and regular maintenance ensure optimal performance. By mastering these elements, users can unlock the full potential of the MG12XU for high-quality audio mixing. Keep this manual handy for quick reference and troubleshooting.
8.2 Final Tips for Optimal Use

For optimal performance, regularly clean the mixer and update its firmware. Use high-quality cables to minimize noise and interference. Organize your setup with cable ties and labels for easy access; Always power on equipment in the correct order to prevent damage. Experiment with scenes and effects to tailor the mixer to your needs. Keep the manual handy for quick reference. By following these tips, you’ll ensure longevity, reliability, and the best possible sound quality from your Yamaha MG12XU. Happy mixing!