
Welcome to the Pro Thermostat user manual! This guide helps you understand and operate your thermostat effectively, ensuring energy efficiency and comfort in your home․
1․1 Product Overview
The Pro Thermostat is a cutting-edge, smart home device designed to regulate your heating and cooling systems efficiently․ It features a sleek, modern design with an intuitive touchscreen interface․ This thermostat is compatible with a wide range of HVAC systems, including gas, electric, and heat pumps․ With advanced temperature control, it ensures consistent comfort while optimizing energy usage․ The Pro Thermostat also supports voice control through smart home systems like Amazon Alexa and Google Assistant․ Its energy-saving capabilities and remote access features make it a versatile solution for modern homes․ This device is designed to be user-friendly, providing real-time feedback and customizable settings to suit your lifestyle and preferences․

1․2 Safety Precautions
Before installing or operating the Pro Thermostat, ensure your safety and the device’s proper function by following these guidelines:
- Always turn off the power to your HVAC system at the circuit breaker before starting installation․
- Avoid touching electrical components with wet hands or while standing on a wet surface․
- Do not expose the thermostat to water or extreme temperatures․
- Keep the device out of reach of children to prevent accidental damage or improper settings․
- Dispose of the old thermostat responsibly, following local regulations for electronic waste․
- Only use the thermostat with compatible HVAC systems, as specified in this manual․
By adhering to these precautions, you can ensure safe and effective use of your Pro Thermostat․

Installation Guide
This guide provides a comprehensive walkthrough for installing your Pro Thermostat, ensuring a smooth and efficient setup process․ Follow the steps carefully for optimal performance and functionality․
2․1 Compatibility Check
Before installation, ensure the Pro Thermostat is compatible with your HVAC system․ Verify voltage requirements (24V AC) and system type (heat pump, furnace, or dual fuel)․ Check wiring compatibility and confirm the presence of a C-wire if required․ Ensure your system supports the thermostat’s advanced features, such as geofencing or smart sensors․ Refer to the compatibility chart in the packaging or consult the manufacturer’s website for detailed specifications․ Incompatible systems may require additional adapters or professional assistance․ Proper compatibility ensures seamless operation and optimal performance of your Pro Thermostat․

2․2 Tools and Materials Needed
To install the Pro Thermostat, gather the following tools and materials:
- A flathead or Phillips screwdriver
- A drill and drill bits (for wall mounting)
- A level (to ensure proper alignment)
- Wire strippers (for trimming wires)
- A voltage tester (to verify power levels)
- A pencil (for marking wire connections)
Materials needed include wall anchors, screws, and potentially a C-wire adapter if your system requires one․ Ensure all items are readily available before starting the installation process․
2․3 Step-by-Step Installation Process
- Turn off power to your HVAC system at the circuit breaker․
- Remove the old thermostat and label the wires for identification․
- Install the new mounting plate and attach the Pro Thermostat․
- Connect the wires to the appropriate terminals, following the manual․
- Secure the thermostat to the wall and restore power․
- Test the system to ensure proper functionality․
- Set up the thermostat using the mobile app or on-device interface․
Ensure all connections are secure and follow safety guidelines․ If unsure, consult a licensed electrician․

Understanding the Thermostat Features
The Pro Thermostat offers advanced features like touch-screen controls, smart sensors, and voice command compatibility, designed to enhance comfort and energy efficiency in your home․
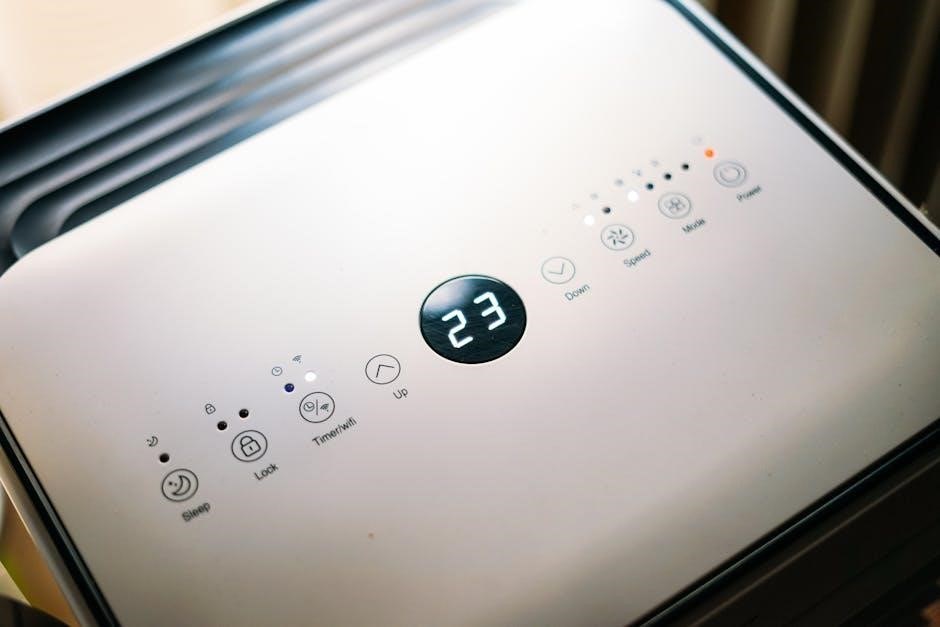
3․1 Display and Button Layout
The Pro Thermostat features a sleek, high-resolution 3․5-inch color touchscreen display․ The interface is intuitive, with clear menus and icons for easy navigation․ Below the screen, you’ll find a set of capacitive touch buttons: Menu, Back, and OK․ These buttons provide quick access to settings and confirm selections․ The display automatically adjusts brightness based on ambient light, ensuring visibility in any room condition․ The layout is designed for simplicity, with large, responsive buttons and a clean interface that minimizes clutter․ This design ensures users can easily adjust settings, view temperature readings, and access advanced features without confusion․ The touchscreen is responsive and durable, built to withstand daily use while maintaining a modern aesthetic․
3․2 Temperature Sensors and Accuracy
The Pro Thermostat is equipped with advanced dual-sensor technology, combining ambient temperature and setpoint temperature sensors for precise control․ The sensors provide accurate readings within ±0․5°F, ensuring consistent comfort․ The thermostat continuously monitors temperature changes and adjusts heating or cooling systems to maintain your desired setting․ Geofencing capabilities further enhance accuracy by using your location to optimize temperature adjustments․ For added precision, the thermostat learns your home’s thermal characteristics over time․ Calibration options are available for fine-tuning, allowing users to customize sensitivity․ This advanced sensor system minimizes temperature fluctuations, providing stable and energy-efficient performance․ With its cutting-edge technology, the Pro Thermostat delivers reliable and accurate temperature control for optimal comfort and energy savings․
3․4 Remote Access and Smart Home Integration
The Pro Thermostat offers seamless remote access through its dedicated mobile app, allowing you to adjust settings, monitor energy usage, and receive notifications from anywhere․ Compatible with smart home systems like Apple HomeKit, Google Assistant, and Amazon Alexa, the thermostat integrates effortlessly with your existing smart devices․ Voice commands enable hands-free control, while geofencing uses your location to optimize temperature adjustments․ The thermostat also supports multi-device control, letting you manage multiple units from a single interface․ Regular software updates ensure compatibility with the latest smart home technologies․ With remote access and smart home integration, the Pro Thermostat enhances convenience, energy efficiency, and overall home comfort․
Operating the Pro Thermostat
Welcome to the operating section of your Pro Thermostat․ Learn how to adjust settings, create schedules, and optimize energy use for maximum comfort and efficiency․
4․1 Basic Operations: Setting Temperature
To set the temperature, ensure the thermostat is powered on․ Use the touch interface or buttons to adjust the desired temperature․ Press ↑ or ↓ to increase or decrease the setpoint․ The display will show the current room temperature and your desired setting․ Select Heat, Cool, or Off mode using the mode button․ For quick adjustments, tap the temperature value on the screen and slide up or down․ The thermostat will automatically start operating to reach your set temperature․ You can also use the mobile app for remote temperature adjustments, ensuring comfort and energy efficiency from anywhere․ Always ensure the thermostat is set to your preferred mode before leaving the room for optimal performance․
4․2 Creating a Schedule
To create a schedule, navigate to the Menu and select Schedule․ Choose the day(s) you want to program and set the time and desired temperature․ Use the ↑ or ↓ buttons to adjust values․ For a weekly schedule, repeat the process for each day or copy settings to multiple days․ You can also customize settings for different times of the day, such as wake, leave, return, and sleep․ Once configured, press Save to confirm․ The thermostat will automatically adjust the temperature according to your schedule․ Use the mobile app to modify schedules remotely for added convenience․ Scheduling helps optimize energy usage and ensures consistent comfort throughout the day․
4․3 Energy-Saving Modes
The Pro Thermostat offers multiple energy-saving modes to reduce your energy consumption․ Enable Eco Mode to minimize heating or cooling when the house is unoccupied or during sleep hours․ Away Mode adjusts the temperature based on your location, using geofencing technology․ For extreme weather, Energy Star Certified Mode optimizes settings to meet energy efficiency standards․ These modes can be activated manually or automated through your schedule․ Use the mobile app to monitor and adjust energy-saving settings remotely․ Regularly using these modes can significantly lower your energy bills while maintaining comfort․ Ensure your thermostat is updated to the latest software for optimal performance of these features․
4․4 Using the Mobile App
The Pro Thermostat mobile app allows you to control your device remotely, ensuring convenience and energy efficiency․ Download the app from the App Store or Google Play and register an account․ Once paired with your thermostat, you can adjust temperatures, view energy usage, and manage schedules from anywhere․ The app also supports geofencing, automatically adjusting settings based on your location․ Receive notifications for system updates, extreme temperature alerts, and energy-saving tips․ For smart home integration, enable voice control through compatible platforms like Amazon Alexa or Google Assistant․ Ensure your thermostat is connected to Wi-Fi for seamless app functionality․ Refer to the app’s help section for troubleshooting and advanced features․
Maintenance and Troubleshooting
Regular maintenance ensures optimal performance․ Clean the thermostat, update software, and address common issues promptly․ Refer to this section for detailed care and troubleshooting guidance;
5․1 Cleaning the Thermostat
Cleaning your Pro Thermostat regularly ensures optimal performance and longevity․ Turn off the power at the circuit breaker before cleaning․ Use a soft, dry cloth to wipe the display and exterior․ For stubborn marks, lightly dampen the cloth with water, but avoid harsh chemicals or excessive moisture․ Gently clean the sensors and vents to remove dust or debris․ Avoid touching the screen to prevent fingerprints․ Allow the thermostat to air dry completely before restoring power․ Cleaning every 2-3 months is recommended to maintain efficiency and accuracy; Always follow these steps to prevent damage and ensure reliable operation․
5․2 Software Updates
Regular software updates are essential to ensure your Pro Thermostat operates with the latest features and improvements․ To check for updates, navigate to the settings menu on your thermostat or through the mobile app․ If an update is available, the system will prompt you to download and install it․ Ensure the thermostat is connected to Wi-Fi during this process․ Do not turn off the power or interrupt the update, as this could cause system issues․ Once the update is complete, the thermostat will restart automatically․ For manual updates, refer to the app or thermostat interface for step-by-step instructions․ Keeping your software up to date ensures optimal performance and security․
5․3 Common Issues and Solutions

If you encounter issues with your Pro Thermostat, refer to the following solutions:
- Thermostat not turning on: Check the power source and ensure the circuit breaker is on․ Verify that the thermostat is properly connected to the HVAC system․
- Incorrect temperature readings: Ensure the thermostat is calibrated correctly․ Clean the temperature sensor if dirty or obstructed․
- Unresponsive display: Restart the thermostat by turning it off and on again․ If the issue persists, perform a factory reset․
- Wi-Fi connectivity issues: Restart your router and ensure the thermostat is within range of your network․ Check for software updates․
For unresolved issues, contact customer support for further assistance․
Thank you for reading the Pro Thermostat user manual․ This guide has provided you with essential information to maximize your thermostat’s efficiency and comfort․ For further assistance, visit our support website or contact our customer service team․
6․1 Final Tips for Optimal Use
To get the most out of your Pro Thermostat, ensure it is placed away from direct sunlight and drafts for accurate temperature readings․ Regularly update the software to access new features and improvements․ Use the energy-saving modes to reduce your utility bills while maintaining comfort․ Schedule maintenance checks to ensure optimal performance․ Always refer to the user manual for troubleshooting common issues․ By following these tips, you can enjoy a seamless and energy-efficient experience with your Pro Thermostat․
6․2 Contact Information for Support
If you have any questions or need assistance with your Pro Thermostat, our dedicated support team is here to help․ You can reach us via phone at 1-800-PRO-THERM or email us at support@prothermostat․com․ For quick inquiries, visit our website at www․prothermostat․com/support and use the live chat feature․ Our support center is located at 123 Tech Drive, Innovation City, CA 98765․ We are available Monday through Friday, 8 AM to 8 PM EST․ Please have your thermostat model number and purchase date ready for faster assistance․ Our team is committed to resolving your issues promptly and ensuring your satisfaction with the Pro Thermostat․

6․3 Warranty and Return Policy
Your Pro Thermostat is backed by a limited 5-year warranty covering manufacturing defects in materials and workmanship․ For details, visit www․prothermostat․com/warranty․ Returns are accepted within 30 days of purchase․ To initiate a return, contact our support team at returns@prothermostat․com or call 1-800-PRO-THERM․ Items must be in original condition with all accessories included․ Refunds will be processed within 10-14 business days․ Shipping fees are non-refundable unless the product is defective․ For warranty claims, proof of purchase is required․ Damages caused by misuse or tampering are not covered․ For further assistance, refer to our full warranty and return policy on our website or contact customer support․