
Arlec Remote Control Ceiling Fan Instructions: A Comprehensive Guide
Welcome! This guide provides detailed instructions for your Arlec ceiling fan‚ covering setup‚ operation‚ troubleshooting‚ and advanced features for optimal performance and enjoyment.
From initial pairing to resetting WiFi credentials‚ we’ll navigate every aspect of your fan’s functionality‚ ensuring a seamless experience.
Explore dip switch configurations‚ battery replacement‚ and solutions for common issues like a remote that isn’t working or a fan that won’t respond.
Arlec has established itself as a trusted provider of home comfort solutions‚ and their ceiling fans are renowned for blending functionality with modern design. These fans are engineered to enhance air circulation‚ improve energy efficiency‚ and elevate the aesthetic appeal of any room.
Specifically‚ Arlec ceiling fans often incorporate smart technology‚ such as Grid Connect models‚ allowing for convenient control via remote and even integration with home automation systems. The inclusion of a remote control adds a layer of convenience‚ enabling effortless adjustments to speed‚ light‚ and timer settings from anywhere in the room.
Understanding the core features and capabilities of your Arlec ceiling fan is crucial for maximizing its benefits. This guide will walk you through the entire process‚ from initial setup and pairing of the remote to advanced configurations and troubleshooting common issues. Whether you’re dealing with a new installation or simply need to reset your fan‚ this resource will provide clear‚ concise instructions.
Understanding the Remote Control
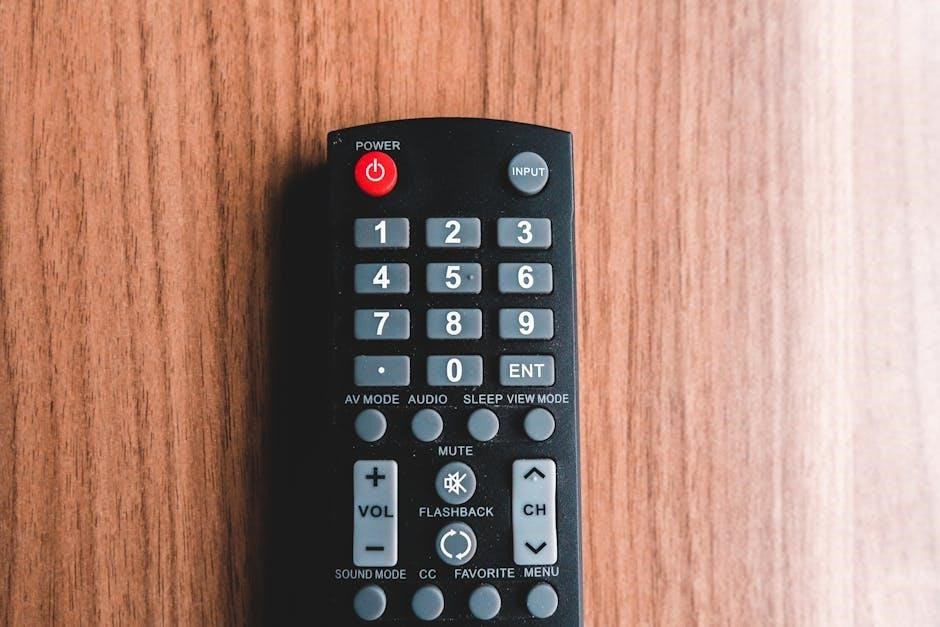
The Arlec remote control is the central hub for operating your ceiling fan‚ offering convenient access to a range of features without needing to physically interact with the fan itself. Typically‚ these remotes utilize a 433MHz frequency for communication with the fan’s receiver unit. Familiarizing yourself with the layout and functions of your specific remote model is the first step towards seamless control.
Most Arlec remotes feature dedicated buttons for power‚ speed adjustment (High‚ Medium‚ Low)‚ light control (on/off‚ dimming)‚ and timer settings. Some advanced models‚ particularly those associated with Grid Connect fans‚ may also include buttons for WiFi connectivity and scheduling.
Before diving into operation‚ ensure the remote has fresh batteries and is properly paired with the fan. If the remote isn’t responding‚ a simple reset or re-sync procedure might be all that’s needed. Understanding the remote’s capabilities unlocks the full potential of your Arlec ceiling fan.
Remote Control Features and Functions
Arlec remote controls boast a variety of features designed for user convenience and customized comfort. Core functions include intuitive speed control‚ allowing you to select from High‚ Medium‚ and Low settings to achieve the desired airflow. Dedicated light control buttons manage the integrated LED light‚ often with dimming capabilities for adjustable ambiance.
Beyond basic operation‚ many remotes incorporate a countdown timer‚ enabling you to set the fan to automatically turn off after a specified duration. More advanced Grid Connect models offer sophisticated scheduling functionality‚ allowing you to pre-program operation times for enhanced energy efficiency and convenience.
The remote’s responsiveness relies on proper pairing and sufficient battery power. If issues arise‚ a reset of both the fan and remote may be necessary; Understanding these features empowers you to fully utilize your Arlec ceiling fan’s capabilities.
Speed Settings
Arlec ceiling fan remotes typically offer three primary speed settings: High‚ Medium‚ and Low. These settings directly control the fan motor’s rotation speed‚ influencing the amount of airflow generated. The High setting delivers maximum cooling‚ ideal for warmer temperatures or rapid air circulation. Selecting Medium provides a balanced airflow‚ suitable for general comfort. The Low setting offers a gentle breeze‚ perfect for quiet operation or nighttime use.
Adjusting the speed is usually accomplished via dedicated buttons on the remote control. Each press cycles through the available speeds. Some models may feature a proportional speed control‚ allowing for finer adjustments beyond the standard three settings.
Proper speed selection optimizes both comfort and energy efficiency. Experimenting with different settings helps you find the ideal balance for your specific needs and preferences‚ ensuring optimal performance from your Arlec fan.
Light Control
Arlec ceiling fans with integrated lights are conveniently controlled via the remote. Dedicated buttons on the remote typically manage the light’s on/off function and brightness levels. A single button usually toggles the light on or off with each press. Many models also incorporate dimming capabilities‚ allowing you to adjust the light intensity to create the desired ambiance.
Dimming is often achieved through incremental steps‚ with each press of the dimming button reducing or increasing the brightness. Some remotes may offer a wider range of dimming levels for precise control. Ensure the bulb type is compatible with dimming functions if utilizing this feature.

If the light isn’t responding‚ check the bulb and ensure it’s securely installed. Refer to the troubleshooting section for further assistance with light-related issues.
Timer Functionality
Arlec remote controls often include a timer function‚ offering convenient automated control of your ceiling fan. This feature allows you to set the fan to turn off automatically after a specified period‚ promoting energy savings and comfort. Typically‚ a “Timer” button on the remote activates this function.
After pressing the timer button‚ you’ll usually select the desired duration – often in hourly increments (1 hour‚ 2 hours‚ 4 hours‚ 8 hours). The fan will then operate for the chosen timeframe before automatically shutting off. Some advanced models feature a countdown timer‚ displaying the remaining time until shutdown.
Scheduling functionality‚ if available‚ allows for more complex timer settings‚ enabling you to pre-program the fan to operate at specific times. Refer to the “Advanced Features” section for details on scheduling.
Initial Setup and Pairing
Before operating your Arlec ceiling fan‚ proper initial setup and pairing of the remote control are crucial. Begin by ensuring the fan is correctly installed and powered on at the breaker. The remote typically doesn’t come pre-paired‚ requiring a synchronization process.
Often‚ a reset of the fan is recommended as a first step. This involves cutting power to the fan at the breaker for approximately five minutes‚ then restoring it. This clears any previous pairings. Next‚ locate the receiver unit within the fan’s canopy.
The pairing process usually involves pressing a specific button on the remote (often a “Pair” or “Learn” button) while simultaneously applying power to the fan. Refer to the “Pairing the Remote to the Fan” section for detailed‚ model-specific instructions.
Pairing the Remote to the Fan

To pair your Arlec remote‚ first ensure the fan has power and the remote has fresh batteries. Begin by removing the canopy of the ceiling fan to access the receiver unit. Locate the “Learn” or “Pair” button on the receiver – it’s often small and recessed.
Press and hold this button. Within the next 60 seconds‚ press and hold the power button on the remote. A successful pairing is usually indicated by the fan’s lights blinking or the fan briefly turning on. If pairing fails‚ repeat the process‚ ensuring you’re within a reasonable distance of the fan.
If issues persist‚ a complete reset of both the fan and the remote might be necessary. Refer to the “Resetting the Fan and Remote” section for guidance. Remember to consult your specific model’s manual for any unique pairing instructions.
Resetting the Fan and Remote
Resetting your Arlec fan and remote can resolve many operational issues. Begin by cutting power to the fan at the circuit breaker for a full five minutes. This completely discharges the receiver unit. After restoring power‚ the fan should be in a reset state‚ ready for pairing.
To reset the remote‚ remove the batteries. Wait for approximately one minute‚ then reinsert them. This clears any existing pairing information. If the remote still doesn’t function‚ try replacing the batteries with a fresh set of the correct type.
Following a reset‚ you’ll need to re-sync the remote to the fan using the pairing procedure outlined in the “Pairing the Remote to the Fan” section. Ensure no interference exists during the pairing process.
Troubleshooting Common Issues
Experiencing problems? This section addresses frequent issues with your Arlec ceiling fan. If the remote isn’t working‚ first check the batteries and ensure they are correctly installed. A simple reset of both the fan (power cycle at the breaker) and the remote (battery removal) often resolves connectivity problems.
If the fan isn’t responding‚ verify the power supply and confirm the receiver unit is properly connected. Check for any obstructions preventing blade movement. For light malfunctioning‚ ensure the bulb is securely fitted and compatible with the fan.
Consult online resources like CleanCrispair.com for additional troubleshooting guidance. Remember to always prioritize electrical safety and disconnect power before inspecting any wiring.
Remote Not Working
Is your Arlec remote unresponsive? Begin by verifying the batteries – ensure they are fresh and inserted with the correct polarity. A complete battery replacement is often the quickest fix. If new batteries don’t resolve the issue‚ attempt a reset of the fan by cutting power at the circuit breaker for approximately five minutes.
Following the power cycle‚ re-sync the remote with the fan‚ referencing the ‘Pairing the Remote to the Fan’ section for detailed instructions. Confirm there’s no interference from other electronic devices. Check the receiver unit within the fan canopy for loose connections.
If problems persist‚ consult the user manual or online resources for specific troubleshooting steps related to your Arlec model.
Fan Not Responding
If your Arlec ceiling fan isn’t responding to the remote or wall control‚ start with the simplest checks. Confirm the power supply to the fan is active – verify the circuit breaker hasn’t tripped. A complete power cycle‚ turning off the breaker for five minutes‚ can often resolve minor glitches.
Next‚ ensure the remote is properly paired with the fan; refer to the ‘Pairing the Remote to the Fan’ section for guidance. Inspect the receiver unit within the fan canopy for any loose wiring connections. If you have a Grid Connect fan‚ check your WiFi connection and reset credentials if necessary.
If the issue continues‚ consult the user manual or seek assistance from a qualified electrician.
Light Not Functioning
When the light on your Arlec ceiling fan fails to operate‚ begin by verifying the bulb is securely installed and hasn’t burned out. If using LED bulbs‚ ensure compatibility with your fan model – some fans have specific bulb requirements. Check the remote control’s light settings; it’s possible the light function has been inadvertently switched off.
If the remote appears functional‚ examine the receiver unit within the fan canopy for loose wiring connections related to the light fixture. A power cycle – switching off the circuit breaker for a few minutes – can sometimes reset the system. For Grid Connect models‚ confirm the WiFi connection is stable.
If problems persist‚ consult the user manual or a qualified electrician for further assistance.
Battery Replacement
Maintaining optimal remote functionality requires periodic battery replacement. When the remote’s range diminishes or it becomes unresponsive‚ batteries are likely the culprit. Before replacing‚ always power off the fan at the circuit breaker to prevent accidental operation during the process.
Typically‚ Arlec remotes utilize AAA or AA batteries. Refer to your specific model’s documentation for the correct type. Carefully open the battery compartment‚ usually located on the back of the remote‚ and remove the old batteries‚ noting the correct polarity (+ and -).
Insert fresh batteries‚ ensuring proper alignment. After installation‚ you may need to re-sync the remote with the fan – see the ‘Syncing the Remote After Battery Change’ section for detailed instructions.
Compatible Battery Types
Selecting the correct battery type is crucial for reliable remote operation and preventing potential damage. Arlec ceiling fan remotes generally operate with either AAA or AA alkaline batteries‚ though specific models may vary. It’s always best to consult your remote’s labeling or the original product manual to confirm the required size.
While standard alkaline batteries are recommended for consistent performance‚ high-quality lithium batteries can offer extended life‚ particularly in cooler climates. Avoid using rechargeable batteries unless specifically stated as compatible‚ as voltage differences can interfere with signal transmission.
Mixing old and new batteries‚ or different battery types‚ is strongly discouraged. This can lead to reduced performance and potential leakage. Always replace all batteries simultaneously for optimal results.
Battery Installation Instructions
Proper battery installation ensures your Arlec remote functions correctly. Begin by locating the battery compartment‚ typically on the back of the remote‚ secured by a sliding cover. Gently slide the cover open‚ revealing the battery slots.
Insert the batteries – usually AAA or AA – according to the polarity markings (+ and -) inside the compartment. Incorrect polarity will prevent the remote from operating. Ensure the batteries are firmly seated in the slots‚ making good contact with the terminals.
Once the batteries are in place‚ carefully slide the battery compartment cover back into its locked position. Test the remote by pressing a button; the fan should respond if the installation was successful. If not‚ double-check the polarity and battery contact.
Syncing the Remote After Battery Change
After replacing the batteries‚ your Arlec remote may require re-syncing with the ceiling fan. This is because the remote’s signal can be disrupted during battery changes. Begin by ensuring the fan has power – turn it on at the breaker switch.
Typically‚ re-syncing involves a specific sequence. Often‚ this includes turning the fan’s power off and on at the breaker five times within a short timeframe (like three seconds). This puts the receiver in pairing mode.
Then‚ press and hold a button on the remote (often the ‘light’ or ‘speed’ button) for several seconds. Watch for a confirmation signal from the fan‚ such as a blink of the light‚ indicating successful synchronization. If it doesn’t work‚ repeat the process.
Dip Switch Settings and Configuration
Dip switches are crucial for establishing communication between your Arlec remote and the ceiling fan receiver. These tiny switches‚ usually located inside both the remote transmitter and the fan’s receiver unit‚ allow you to set a unique code. This prevents interference from other nearby remotes operating on similar frequencies.
The switches are typically labeled 1‚ 2‚ 3‚ and 4. To configure‚ carefully push each switch up or down to create a specific combination. It’s vital that the settings on the receiver unit precisely match those on the remote transmitter.
Consult your fan’s manual for the correct dip switch code for your model. Incorrect settings will prevent the remote from controlling the fan. Experiment with different combinations if unsure‚ testing after each change.
Understanding Dip Switch Codes
Dip switch codes are binary representations used to uniquely identify your Arlec ceiling fan remote control system. Each dip switch position represents a binary digit – either 0 (switch down) or 1 (switch up). Combining these positions creates a unique code‚ ensuring your remote only controls your fan.
These codes aren’t standardized; Arlec uses them to avoid signal conflicts with other devices. A typical code might be “1011‚” meaning switch 1 is up‚ switch 2 is down‚ switch 3 is up‚ and switch 4 is up.
Finding the correct code is essential for proper operation. Your fan’s manual will specify the default or recommended dip switch setting. If you’re experiencing issues‚ verifying the code is the first troubleshooting step. Experimenting with different combinations‚ while tedious‚ can resolve communication problems.
Setting the Codes on Receiver and Transmitter
Synchronizing the receiver (in the fan’s canopy) and the transmitter (the handheld remote) is crucial for operation. Begin by accessing the dip switches on both units – typically small‚ sliding switches labeled 1 through 4.
Carefully set the dip switches on the transmitter to your desired code. Crucially‚ replicate this exact same code on the receiver unit’s dip switches. Ensure each switch is in the corresponding up or down position on both devices.
Power off the fan at the breaker before adjusting the receiver’s switches. After setting both units‚ restore power. If the fan doesn’t respond‚ double-check the code for accuracy. A mismatch prevents communication.
Remember to document your chosen code for future reference‚ especially if needing to reset or replace components.
Arlec Grid Connect Fan Setup
Arlec Grid Connect fans offer smart home integration via WiFi‚ enabling control through apps and voice assistants. The initial setup requires connecting the fan to your home’s 2.4GHz WiFi network. Download the appropriate Arlec app – often specified in the fan’s documentation – and follow the in-app instructions.
The app will guide you through the connection process‚ typically involving entering your WiFi password. Ensure your phone and the fan are within range of your router during setup. Successful connection is indicated by a status change within the app.
If you’ve changed your internet service provider or WiFi details‚ you’ll need to reset the fan’s WiFi credentials and reconnect it to the new network using the app.
Connecting to WiFi (If Applicable)
To connect your Arlec Grid Connect fan to WiFi‚ begin by ensuring your smartphone or tablet is connected to a 2.4GHz WiFi network – 5GHz networks are generally not supported. Download and install the Arlec Smart Home app from your device’s app store. Create an account or log in if you already have one.
Within the app‚ select “Add Device” and choose your Arlec ceiling fan model. Follow the on-screen prompts‚ which typically involve putting the fan into pairing mode – often by holding a specific button on the remote or cycling the power.
Enter your WiFi network password when prompted. The app will then connect the fan to your network. A successful connection will be confirmed within the app‚ allowing remote control.
Resetting WiFi Credentials
If you’ve changed your internet service provider‚ modem‚ or WiFi router‚ you’ll need to reset the WiFi credentials on your Arlec Grid Connect ceiling fan. Begin by powering off the fan at the breaker for approximately 30 seconds. This clears the existing network settings.
Next‚ restore power to the fan and initiate pairing mode through the Arlec Smart Home app. Typically‚ this involves holding a designated button on the remote control for a specific duration – consult your fan’s manual for precise instructions.
Within the app‚ select the option to “re-connect to WiFi” or “add device” again‚ and follow the prompts to enter your new WiFi network name and password. The fan will then reconnect‚ allowing continued smart control.
Advanced Features and Settings
Beyond basic operation‚ your Arlec Grid Connect ceiling fan offers advanced features for personalized comfort. The countdown timer allows you to set the fan to automatically turn off after a specified period‚ ideal for energy saving or sleep. Explore the scheduling functionality within the Arlec Smart Home app to create customized schedules for operation throughout the week.
These schedules can be tailored to your daily routine‚ ensuring the fan operates only when needed. Further customization may include adjusting fan speed profiles or light brightness levels. Remember to regularly check for firmware updates via the app to unlock new features and optimize performance.
Experiment with these settings to create the perfect ambiance and maximize energy efficiency.
Countdown Timer Configuration
Utilizing the countdown timer on your Arlec ceiling fan is a simple way to automate shut-off. Access this feature directly through the remote control; typically‚ a dedicated timer button initiates the process. Once activated‚ use the numeric buttons to set the desired duration – commonly ranging from 30 minutes up to several hours.
The fan will continue operating at its current settings for the specified timeframe before automatically powering down. This is particularly useful for ensuring the fan doesn’t run unnecessarily overnight or when you’re away from home. Remember to confirm the timer setting displayed on the remote before finalizing.
Easy setup allows for convenient‚ energy-conscious operation.
Scheduling Functionality
Arlec’s scheduling functionality elevates your fan control beyond simple on/off operation. This advanced feature‚ accessible via the remote‚ allows you to pre-program the fan to operate at specific times on specific days. Begin by entering the scheduling mode‚ often indicated by a dedicated button on the remote.

You’ll then be prompted to set the desired start time‚ duration‚ and repeat days (e.g.‚ weekdays‚ weekends‚ or individual days). Some models allow for multiple schedules‚ enabling customized comfort throughout the week. Confirm each setting carefully before saving. This feature is ideal for aligning fan operation with your daily routine‚ maximizing comfort and energy efficiency.
The built-in scheduling function offers convenience and control.
Safety Precautions
Prioritizing safety is crucial when installing and operating your Arlec ceiling fan. Always disconnect power at the circuit breaker before performing any maintenance or installation. Ensure the fan is securely mounted to a ceiling joist capable of supporting its weight; Never attempt repairs yourself; consult a qualified electrician for any electrical issues.
Keep children and pets away from the fan blades during operation. Do not insert objects into the fan‚ and avoid operating the fan in damp or wet environments unless specifically designed for such use. Regularly inspect the blades and mounting hardware for any signs of wear or damage. Proper usage of the remote‚ avoiding excessive button pressing‚ also contributes to safe operation.
Electrical safety guidelines must be followed.
Electrical Safety Guidelines
Strict adherence to electrical safety is paramount when dealing with your Arlec ceiling fan. Always ensure the power supply voltage matches the fan’s specifications. Never work on electrical components with wet hands or while standing on a damp surface. If the power cord or plug is damaged‚ immediately discontinue use and contact a qualified electrician for repair or replacement.
Before any maintenance‚ always disconnect power at the circuit breaker. Avoid overloading the circuit with other appliances. Ensure proper grounding to prevent electrical shock. Do not modify the fan’s wiring in any way. If you are unsure about any electrical aspect of the installation or operation‚ consult a licensed electrician. Ignoring these guidelines could result in serious injury or property damage.
Professional installation is recommended.
Proper Usage of the Remote
Maximize your Arlec ceiling fan experience with correct remote operation. Maintain a clear line of sight between the remote and the fan receiver for optimal signal transmission. Avoid obstructing the receiver unit. Press buttons firmly and deliberately to ensure commands are registered. Familiarize yourself with each button’s function – speed control‚ light adjustment‚ and timer settings.
Be mindful of the remote’s range; excessive distance can lead to unreliable operation. Regularly check battery levels to prevent intermittent performance. Avoid exposing the remote to extreme temperatures or moisture. If the remote becomes unresponsive‚ attempt a reset following the instructions in this guide. Proper handling extends the remote’s lifespan and ensures consistent control over your fan’s features.
Enjoy convenient control!