
The Mirage Mini Split Remote Control is a key component for managing your ductless heating and cooling system, offering precise temperature control, mode selection, and scheduling features for optimal comfort and energy efficiency.
1.1 Overview of the Mirage Mini Split System
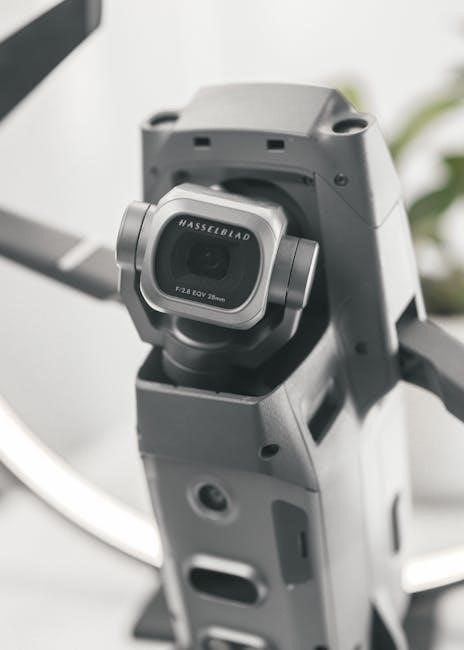
The Mirage Mini Split System is a highly efficient and scalable solution for heating and cooling specific areas of a home or office. Its ductless design allows for flexible installation, making it ideal for spaces where traditional ductwork is not feasible. The system is designed for versatility, catering to various climates and room sizes, with models ranging from 9000 to 24000 BTU. It operates quietly and features advanced functions like self-cleaning modes to maintain efficiency. The system uses eco-friendly R-410A refrigerant, ensuring reliable performance while minimizing environmental impact. With its compact indoor and outdoor units, the Mirage Mini Split System offers a sleek, modern aesthetic that blends seamlessly into any decor. Its smart airflow technology ensures even temperature distribution, providing consistent comfort without the need for ductwork.
1.2 Importance of the Remote Control for System Operation
The remote control is an essential tool for operating the Mirage Mini Split System, enabling seamless control over heating, cooling, and fan modes. It allows users to adjust temperature settings, activate advanced features like Quiet Mode and Energy-Saving Mode, and schedule operations using the timer function. Without the remote, users would not be able to access these features, making it a vital component for optimizing comfort and energy efficiency. The remote ensures precise control over the system, allowing users to customize their environment effortlessly. Its intuitive design simplifies system management, making it easy to navigate and adjust settings. By providing convenient access to all system functions, the remote enhances the overall user experience, ensuring the Mirage Mini Split System operates efficiently and effectively in any setting.

Features of the Mirage Mini Split Remote Control
The Mirage Mini Split Remote Control features a user-friendly interface with buttons for mode selection, temperature adjustment, and advanced settings like Quiet Mode and Energy-Saving. An LCD screen displays current settings and indicators for operational status, ensuring intuitive control over the system.
2.1 Buttons and Their Functions
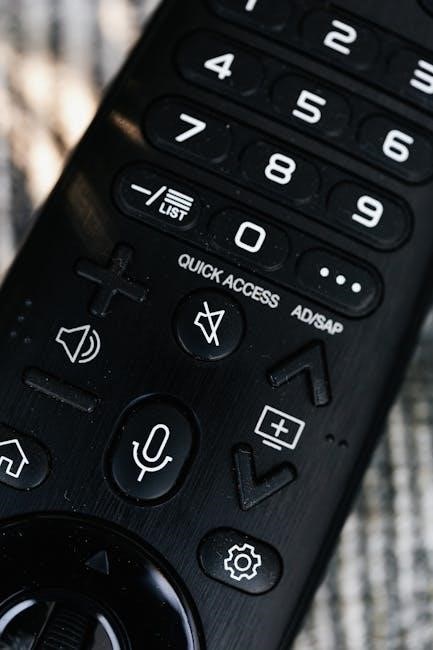
The Mirage Mini Split Remote Control features an ergonomic design with clearly labeled buttons for easy operation. The Power button turns the system on/off, while the Mode button allows switching between cooling, heating, fan, and dry modes. The Temperature buttons (up/down arrows) adjust the set temperature, and the Fan Speed button controls airflow intensity. The Timer button enables scheduling, and the Quiet Mode reduces operational noise. The Energy-Saving button optimizes efficiency, and the Turbo button provides rapid cooling or heating. Additional buttons include Clock for time settings and navigation arrows for menu options. Each button is designed for intuitive control, ensuring seamless management of your mini-split system’s operations and settings.
2.2 LCD Screen and Indicators
The Mirage Mini Split Remote Control features an LCD screen that displays current settings, operational status, and error codes. The screen shows the set temperature, mode (cool, heat, fan, dry), and fan speed. Indicators like “SE” appear when energy-saving mode is active, while icons denote quiet mode, turbo function, and timer status. The LCD also provides real-time feedback, such as temperature adjustments and scheduling details; Error codes like “E1” or “E2” flash on the screen to signal issues, guiding users to specific troubleshooting steps. The clear display ensures intuitive monitoring and control of the system, making it easy to adjust settings or address problems promptly. The screen’s brightness and clarity enhance user experience, allowing seamless management of the mini-split system’s operations and settings.
2.3 Advanced Features (Quiet Mode, Energy-Saving, Turbo, Sleep Mode)
The Mirage Mini Split Remote Control offers advanced features to enhance comfort and efficiency. Quiet Mode reduces operational noise to 27 dB, ideal for bedrooms or offices. Energy-Saving Mode optimizes performance by adjusting temperature in small increments, lowering energy consumption without sacrificing comfort. Turbo Mode provides rapid cooling or heating, quickly reaching the desired temperature. Sleep Mode gradually adjusts the temperature during sleep, ensuring a comfortable environment while saving energy. These features are easily accessible via dedicated buttons on the remote, allowing users to customize their experience. The remote also supports scheduling and smart home integration, further enhancing convenience. By utilizing these advanced features, users can optimize their mini-split system’s performance, reduce energy costs, and enjoy a more personalized climate control experience year-round. These modes ensure the system adapts to various needs, making it versatile and user-friendly for any situation.
Pairing the Remote Control with the Mini Split Unit
Pairing involves syncing the remote with the unit by pressing and holding the pairing button until the LED blinks, ensuring smooth communication for efficient operation and control.
3.1 Syncing the Remote with the Unit
Syncing the Mirage Mini Split Remote Control with the unit ensures seamless communication and control. To pair the remote, press and hold the pairing button on the remote until the LED blinks. Simultaneously, press the pairing button on the indoor unit. The remote will automatically sync with the unit, confirming successful pairing. Ensure the remote is within 20 feet of the unit and free from obstacles or interference during the process. This step is crucial for enabling all remote functions, including mode selection, temperature adjustment, and advanced features. Proper syncing ensures reliable operation and optimal performance of your mini-split system. Follow the manufacturer’s instructions for specific pairing procedures, as slight variations may exist depending on the model. Once synced, the remote will effectively control the unit, providing precise adjustments for comfort and energy efficiency.
3.2 Setting the Clock and Basic Settings
Setting the clock and basic settings on the Mirage Mini Split Remote Control is essential for optimal system operation. To set the clock, press the clock button and use the navigation arrows to adjust the time. Basic settings include selecting temperature units (°F or °C), enabling the display, and setting default modes. Follow the on-screen prompts to configure these options. Proper setup ensures the system operates according to your preferences, enhancing user experience and efficiency. Additional settings may include display brightness and language selection, depending on the model. Always refer to the user manual for specific instructions, as settings may vary. Ensuring accurate clock and basic settings allows for seamless control and customization of your mini-split system, optimizing comfort and energy efficiency.

Basic Operations Using the Remote Control
The Mirage Mini Split Remote Control enables easy switching between cooling, heating, and fan modes, with straightforward temperature and fan speed adjustments for optimal comfort.
4.1 Switching Between Cooling, Heating, and Fan Modes
The Mirage Mini Split Remote Control allows seamless transitions between cooling, heating, and fan modes. Press the MODE button to cycle through options: Cool for lowering the room temperature, Heat for warmth, and Fan to circulate air without cooling or heating. Each mode is designed to address specific comfort needs, ensuring optimal performance in various weather conditions. The remote’s intuitive interface makes it easy to select the desired mode, while the LCD screen displays the current mode for clarity. By switching modes efficiently, users can maintain a comfortable environment while optimizing energy usage. This feature is particularly useful for adapting to seasonal changes or adjusting to different indoor activities. Proper mode selection enhances system efficiency and ensures consistent comfort throughout the year.
4.2 Adjusting Temperature and Fan Speed
Adjusting temperature and fan speed on the Mirage Mini Split is straightforward using the remote control. Use the UP and DOWN arrows to set your desired temperature between 60°F and 90°F. The remote allows precise control, ensuring your space reaches the perfect comfort level. For fan speed, press the FAN SPEED button to cycle through LOW, MEDIUM, and HIGH settings. This feature optimizes airflow distribution and noise levels, providing flexibility for different scenarios. The LCD screen displays the selected temperature and fan speed, making it easy to monitor adjustments. By fine-tuning these settings, you can balance comfort and energy efficiency, ensuring optimal performance year-round. Regular adjustments help maintain consistent temperatures and airflow, enhancing overall system efficiency and user satisfaction. This intuitive control enables a personalized environment tailored to your preferences.
Advanced Features and Settings
The Mirage Mini Split Remote Control offers advanced features like Quiet Mode, Energy-Saving Mode, Turbo Mode, and Sleep Mode for enhanced comfort and efficiency, along with Smart Home Integration for seamless connectivity.
5.1 Timer Functionality for Scheduled Operations
The timer functionality on the Mirage Mini Split Remote Control allows users to schedule operations in advance, optimizing energy usage and ensuring comfort. By setting specific start and stop times for cooling or heating modes, you can ensure your space is comfortable only when needed, reducing unnecessary energy consumption. This feature is particularly useful for maintaining desired temperatures during work hours or overnight. The timer can be easily accessed via the remote control, enabling you to program the system to turn off when unoccupied or during sleep. Adjusting temperatures slightly while using the timer further enhances efficiency. Combining this feature with energy-saving mode ensures optimal performance without sacrificing comfort, helping to lower utility bills while maintaining a comfortable environment. This advanced setting makes the Mirage Mini Split system even more versatile and user-friendly for seamless control.
5.2 Quiet Mode for Reduced Noise
The Mirage Mini Split Remote Control features a Quiet Mode designed to minimize operational noise, making it ideal for bedrooms, home offices, or any space where noise reduction is essential. By activating Quiet Mode, the system reduces its operational noise to as low as 27 dB, ensuring a peaceful environment. This feature is particularly beneficial for nighttime use or in areas where quiet operation is preferred. The remote control allows users to enable Quiet Mode effortlessly with a dedicated button, providing a seamless transition to a quieter operation. Additionally, Quiet Mode works in conjunction with other advanced features, such as self-cleaning functions and smart airflow, to enhance comfort and efficiency. This mode is a testament to the system’s focus on user convenience and tailored comfort, ensuring optimal performance while maintaining a serene atmosphere.
5.3 Energy-Saving Mode for Optimal Efficiency
The Energy-Saving Mode on the Mirage Mini Split Remote Control is designed to optimize energy consumption while maintaining comfort. This mode adjusts the system’s operation by small temperature increments, reducing energy usage without sacrificing performance. To activate it, press the TEMP and CLOCK buttons simultaneously; the remote will display “SE” to confirm activation. This feature is ideal for balancing energy efficiency and comfort, especially during periods of consistent temperature needs. The Energy-Saving Mode works seamlessly with other features, such as the timer, to further enhance efficiency. By enabling this mode, users can lower their utility bills while still enjoying a comfortable environment. It’s a practical solution for eco-conscious users seeking to minimize energy waste without compromising on system performance.
5.4 Smart Home Integration
The Mirage Mini Split Remote Control offers seamless integration with smart home systems, enhancing convenience and control. Users can connect their mini split system to popular smart home platforms like Amazon Alexa or Google Home, enabling voice command functionality. This feature allows for effortless adjustments to temperature, modes, and schedules without needing the physical remote. Additionally, the remote supports Wi-Fi connectivity, enabling control via a smartphone app. This integration allows users to monitor and adjust their system remotely, ensuring optimal comfort and energy efficiency. Advanced features like geofencing and energy usage reports further enhance the smart home experience. For compatibility, ensure your system supports smart home integration and consult the user manual for specific setup instructions. This feature is ideal for modern households seeking a unified and convenient way to manage their climate control systems.
Maintenance and Care
Regularly clean the remote with a soft cloth and ensure proper unit airflow. Check and replace batteries as needed for optimal performance and longevity of the system.
6.1 Cleaning the Remote Control
Cleaning the Mirage Mini Split Remote Control is essential for maintaining its functionality and hygiene. Use a soft, dry cloth to gently wipe the surface, removing dust and dirt. For stubborn stains, lightly dampen the cloth with water, but avoid harsh chemicals or liquids that could damage the buttons or LCD screen. Regularly inspect the battery compartment and clean out any dust or debris that may interfere with battery contact. Ensure the remote is completely dry before use to prevent malfunctions. Cleaning the remote regularly helps maintain its responsiveness and ensures accurate operation of your mini-split system. This simple maintenance step can extend the life of your remote and keep it functioning at its best.

6.2 Maintaining the Mini Split Unit
Regular maintenance of the Mirage Mini Split Unit is crucial for optimal performance and efficiency. Start by cleaning or replacing the air filters to ensure proper airflow and prevent dust buildup. Inspect the refrigerant lines for any signs of leaks or damage and ensure they are well-insulated. Check the outdoor unit for debris and ensure it has adequate clearance for proper ventilation. Schedule annual professional servicing to maintain warranty validity and ensure all components are functioning correctly. Regular maintenance helps prevent major issues, reduces energy consumption, and extends the system’s lifespan. By keeping the unit well-maintained, you can enjoy consistent heating and cooling performance while minimizing repair costs and ensuring reliable operation year-round.
6.3 Battery Care and Replacement
Proper battery care and replacement are essential for maintaining the functionality of your Mirage Mini Split Remote Control. Use fresh AA or AAA batteries to ensure optimal performance and replace them when the remote’s display dims or responsiveness decreases. Store spare batteries in a cool, dry place and always check their expiration dates before use. Avoid mixing old and new batteries, as this can reduce performance. When replacing batteries, ensure they are correctly oriented to match the polarity indicators in the compartment. After installation, test the remote to confirm it operates smoothly. Regular battery maintenance ensures reliable control over your mini-split system, preventing interruptions in heating or cooling. By following these practices, you can extend the life of your remote and maintain seamless operation of your Mirage Mini Split System.

Troubleshooting Common Issues
Address issues like non-responsiveness by checking batteries, ensuring proper pairing, and consulting the manual for error codes. Resetting the remote or re-pairing may resolve connectivity problems.
7.1 Remote Control Not Responding
If the Mirage Mini Split Remote Control stops responding, start by checking the batteries. Ensure they are fresh and correctly installed. Weak or dead batteries can cause connectivity issues. Next, verify that the remote is within the recommended 20-foot range and has a clear line of sight to the indoor unit. Obstructions like walls or furniture can interfere with the signal. If the issue persists, reset the remote by removing the batteries for 30 seconds. Re-pair the remote with the unit by pressing and holding the pairing button on both devices until the LED blinks. If the problem continues, consult the user manual for specific error codes and troubleshooting steps. Persistent issues may require professional assistance to ensure proper functionality.
7.2 Understanding Error Codes
Understanding error codes on your Mirage Mini Split is crucial for quick troubleshooting. Codes like E1 or E2 often indicate specific issues, such as sensor malfunctions or communication errors between the remote and the unit. Refer to the user manual for a detailed explanation of each code, as they vary by model. If an error code appears, start by checking the sensors and ensuring proper installation. Restart the unit and verify that all connections are secure. If the issue persists, consult the manual for guidance or contact a certified technician for professional assistance. Regular maintenance and prompt attention to error codes can prevent minor issues from escalating, ensuring your system operates efficiently and effectively. Always keep the manual handy for quick reference to resolve problems and restore functionality.
7.3 Resetting the Remote Control
Resetting the Mirage Mini Split Remote Control can resolve connectivity or functionality issues. To reset, remove the batteries from the remote and press and hold the Power button for 10-15 seconds to discharge any stored power. Reinsert the batteries and test the remote. If issues persist, ensure the remote is paired correctly with the unit. Resetting restores default settings, which may help resolve non-responsiveness or incorrect operations. This process is a simple troubleshooting step before seeking further assistance. Regular resets can maintain optimal performance and ensure smooth communication between the remote and the mini split unit. Always refer to the user manual for specific reset instructions tailored to your model. Resetting is a quick and effective way to address minor malfunctions and restore remote functionality. It is a recommended first step in troubleshooting common issues.
Additional Considerations
Ensure the remote has a clear line of sight with the unit, avoiding obstructions. Check for signal interference and maintain fresh batteries for optimal performance and range.
8.1 Range Limitations and Signal Strength
The Mirage Mini Split Remote Control typically operates within a 20-foot range, requiring a clear line of sight with the indoor unit for reliable signal strength. Physical obstructions like walls or furniture can weaken the signal, while electromagnetic interference from devices such as fluorescent lamps or wireless phones may also disrupt communication. To ensure optimal performance, maintain an unobstructed path between the remote and the unit. If range limitations are an issue, consider using a signal booster or Wi-Fi adapter for extended control. Relocating the unit or remote to a more central location can also improve connectivity. Always ensure fresh batteries are installed, as weak batteries can reduce signal effectiveness. Regularly test different angles and positions to find the strongest connection for seamless operation.
8.2 Upgrading or Replacing the Remote Control
Upgrading or replacing the Mirage Mini Split Remote Control can enhance functionality and resolve potential issues. If your remote lacks modern features like Wi-Fi connectivity or voice control, consider upgrading to a newer model for improved performance and energy efficiency. Ensure the new remote is compatible with your specific unit to maintain advanced features. Purchase from authorized dealers or trusted retailers to guarantee authenticity and compatibility. Replacing the remote may also be necessary if it malfunctions or becomes outdated. When upgrading, check for features like smart home integration, which can enhance your system’s versatility. Always refer to the user manual for compatibility details and installation instructions. Upgrading ensures seamless control and optimizes your mini-split system’s performance for long-term convenience and efficiency.
8.3 Ensuring Compatibility with Smart Home Systems
Ensuring compatibility with smart home systems is crucial for seamless integration of your Mirage Mini Split Remote Control. Many newer models offer Wi-Fi connectivity, allowing control through smart home platforms like Alexa or Google Home. To integrate, ensure your remote supports smart home features and is compatible with your system. Check the user manual or manufacturer’s website for compatibility details. If your remote lacks Wi-Fi, consider using a Wi-Fi adapter or upgrading to a smart-enabled remote. This allows voice control and app-based adjustments, enhancing convenience and efficiency. Always verify compatibility before purchasing additional devices to ensure smooth integration. Proper setup enables advanced control, optimizing your mini-split system’s performance within your smart home ecosystem.
The Mirage Mini Split Remote Control enhances comfort and efficiency, offering precise control and smart features. Proper use and maintenance ensure optimal performance and energy savings year-round.
9.1 Summary of Key Features and Benefits
The Mirage Mini Split Remote Control offers a user-friendly interface with buttons for mode selection, temperature adjustment, and fan speed control. Its LCD screen displays settings and operational status, ensuring intuitive control. Advanced features like Quiet Mode, Energy-Saving Mode, Turbo, and Sleep Mode enhance comfort and efficiency. The remote also supports timer functionality for scheduled operations and smart home integration, allowing seamless control. Regular maintenance, such as cleaning the remote and replacing batteries, ensures optimal performance. By following the instructions, users can maximize energy efficiency, customize settings, and enjoy a comfortable environment year-round. Proper use and care of the remote extend its lifespan and maintain system efficiency, making it a vital tool for managing your Mirage Mini Split System effectively.
9.2 Final Tips for Optimal Use

To maximize the performance of your Mirage Mini Split Remote Control, ensure a clear line of sight between the remote and the unit, avoiding obstacles and interference. Regularly clean the remote with a soft cloth and replace batteries when the display dims. Use the timer and energy-saving features to optimize efficiency and reduce energy consumption. For troubleshooting, check battery levels, ensure proper pairing, and refer to the user manual for error codes. Experiment with modes like Quiet and Turbo to tailor comfort to your needs. Schedule annual maintenance for the unit and maintain filter cleanliness for optimal airflow. By following these tips, you can enhance your system’s efficiency, extend its lifespan, and enjoy consistent comfort throughout the year.