Welcome to the Sharp Digital Alarm Clock, a modern and essential addition to any bedroom. This guide helps you understand and utilize its features effectively, ensuring a seamless experience for both new and experienced users.
1.1 Overview of the Sharp Digital Alarm Clock
The Sharp Digital Alarm Clock is a sleek, modern device designed to enhance your daily routine. It combines functionality with style, offering precise timekeeping, customizable alarms, and user-friendly controls. With a clear digital display, it ensures easy readability, even in low-light conditions. This alarm clock is perfect for anyone seeking reliability and convenience, featuring multiple alarm options, adjustable brightness, and a compact design that fits seamlessly into any bedroom or office setting. Its intuitive interface makes it simple to navigate and customize, catering to a wide range of preferences and needs.
1.2 Importance of Using a Digital Alarm Clock
A digital alarm clock offers precision, reliability, and convenience, helping you stay on schedule effortlessly. It ensures you wake up on time, making it essential for daily routines. With features like backlighting and multiple alarms, it enhances productivity and reduces oversleeping. Additionally, it serves as a practical tool for travelers and individuals with busy lifestyles, providing a consistent wake-up experience. Investing in a digital alarm clock promotes better time management and helps you start your day efficiently.
1.3 Key Features of the Sharp Digital Alarm Clock
The Sharp Digital Alarm Clock offers a range of innovative features designed for convenience and functionality. It includes a clear, easy-to-read LCD display, multiple alarm settings for daily, weekly, or one-time use, and a built-in USB port for charging devices. The clock also features a battery backup option to maintain time and alarms during power outages. Additionally, it includes adjustable display brightness, a snooze function, and customizable alarm tones to suit personal preferences. These features make it a versatile and user-friendly addition to any bedroom.
Unboxing and Initial Setup
Start by carefully unboxing the Sharp Digital Alarm Clock and inspecting its components. Place it in a convenient location, plug it in, or insert batteries to begin setup.
2.1 Unboxing the Sharp Digital Alarm Clock
When you unbox the Sharp Digital Alarm Clock, you’ll find the clock itself, a power adapter, batteries, and a user manual. Carefully remove the clock from the packaging and inspect it for any damage. Locate the included accessories, such as the power cord and backup batteries, to ensure everything is accounted for. Take a moment to familiarize yourself with the clock’s buttons and display before proceeding to the next steps. This ensures a smooth setup process and helps you make the most of its features.
2.2 Understanding the Components and Accessories
Inside the box, you’ll find the Sharp Digital Alarm Clock, a power adapter, USB cable, and user manual. The clock features a clear LCD display, alarm buttons, and USB ports for charging devices. Additional accessories may include a backup battery and stand. Familiarize yourself with each component to ensure proper setup and functionality; The power adapter connects to the clock, while the USB cable is for firmware updates. The manual provides detailed instructions for operation. Understanding these components will help you maximize the clock’s features and enjoy a hassle-free experience.
2.3 Placing the Alarm Clock in the Ideal Location
Place the Sharp Digital Alarm Clock on a stable, flat surface near your bed for easy visibility and accessibility. Ensure it is at eye level to avoid straining your neck. Position it away from direct sunlight to prevent glare on the display. Keep it at least 6 inches away from walls or heavy furniture to minimize vibrations and noise interference. Ideally, place it within arm’s reach to easily adjust settings or turn off the alarm without getting out of bed. Proper placement enhances functionality and ensures a disturbance-free sleeping environment.
2.4 Powering On the Alarm Clock for the First Time
To power on the Sharp Digital Alarm Clock, insert the batteries or plug in the AC adapter. Ensure the batteries are correctly positioned to match the polarity signs. If using an AC adapter, connect it to a nearby power outlet. Press the power button, usually located on the top or rear of the device. The display will illuminate, and the clock will start up with default settings. If batteries are used, the clock will automatically enter low-power mode if no AC power is detected. The device is now ready for further setup and configuration.
Setting Up the Time and Date
Accurately setting the time and date is essential for your alarm clock to function properly. Follow the simple steps to ensure your clock displays the correct information.
3.1 Understanding the Time and Date Display
The Sharp Digital Alarm Clock features a clear LCD display that shows the current time and date in an easy-to-read format. The time is displayed in either 12-hour or 24-hour format, depending on your preference, and the date is shown in a straightforward month/day/year layout. The display automatically updates to ensure accuracy, and the brightness can be adjusted for optimal visibility. Understanding the time and date display is essential for setting alarms and maintaining a consistent schedule. Familiarize yourself with the layout to make the most of its functionality.
3.2 Manually Setting the Time and Date
To manually set the time and date, press the MODE button until the time display flashes. Use the UP and DOWN buttons to adjust the hour, then press MODE to move to minutes. Repeat for the date, ensuring accuracy. If your clock supports it, toggle between 12-hour and 24-hour formats using the FORMAT button. Once done, press MODE to save your settings. This method is ideal when an atomic signal is unavailable or when you prefer precise control over the time and date display.
3.3 Synchronizing with an Atomic Clock (if applicable)
To ensure precise timekeeping, your Sharp Digital Alarm Clock can synchronize with an atomic clock. Enable the atomic sync feature in the settings menu. Place the clock near a window for optimal signal reception. Once connected, the clock will automatically update the time and date, providing accurate timekeeping. This feature eliminates manual adjustments and ensures your alarm clock stays perfectly synchronized. Note that this function may require a few minutes to establish a connection. Refer to your user manual for specific instructions if issues arise.
3.4 Adjusting Time Zones
Adjusting the time zone on your Sharp Digital Alarm Clock ensures accuracy wherever you are. Press the Menu button and navigate to the Time Zone option. Use the arrow keys to select your region. Once chosen, confirm to save. This feature is ideal for travelers or those in areas with unique time zone requirements. Ensure the clock updates correctly after selection. Some models may automatically adjust for daylight saving time, so check your settings to enable or disable this feature as needed.
Setting the Alarm
Setting the alarm on your Sharp Digital Alarm Clock is straightforward. Choose from daily, weekly, or one-time alarms, and customize volume and tone to your preference for a perfect wake-up experience.
4.1 Understanding the Alarm Types (Daily, Weekly, One-Time)
The Sharp Digital Alarm Clock offers three convenient alarm types to suit your needs. A Daily Alarm repeats every day at the same time, ideal for wake-up routines. A Weekly Alarm activates only on selected days, perfect for work or school schedules. A One-Time Alarm sets a single alert for a specific date and time, great for reminders or events. Understanding these options allows you to customize your alarms efficiently, ensuring you stay on track without unnecessary disturbances.
4.2 Setting a Daily Alarm
To set a daily alarm, press the Alarm button until the daily alarm indicator appears on the display. Use the + or ⎼ buttons to set your desired wake-up time. Select AM or PM using the corresponding button. Once set, press the Alarm button again to save. The alarm will now activate at the same time every day. Ensure the alarm is turned on by checking the alarm icon on the display. You can test the alarm by holding the Test button to confirm it works correctly.
4.3 Setting a Weekly Alarm
To set a weekly alarm, press the Alarm button until the display shows the weekly alarm option. Use the navigation buttons to select the specific days of the week you want the alarm to activate. Choose your desired time using the Hour and Minute buttons. Once set, confirm by pressing the Set button. The alarm will now activate only on the selected days at the specified time. Ensure to review your settings to confirm accuracy and avoid unintended wake-ups.
4.4 Setting a One-Time Alarm
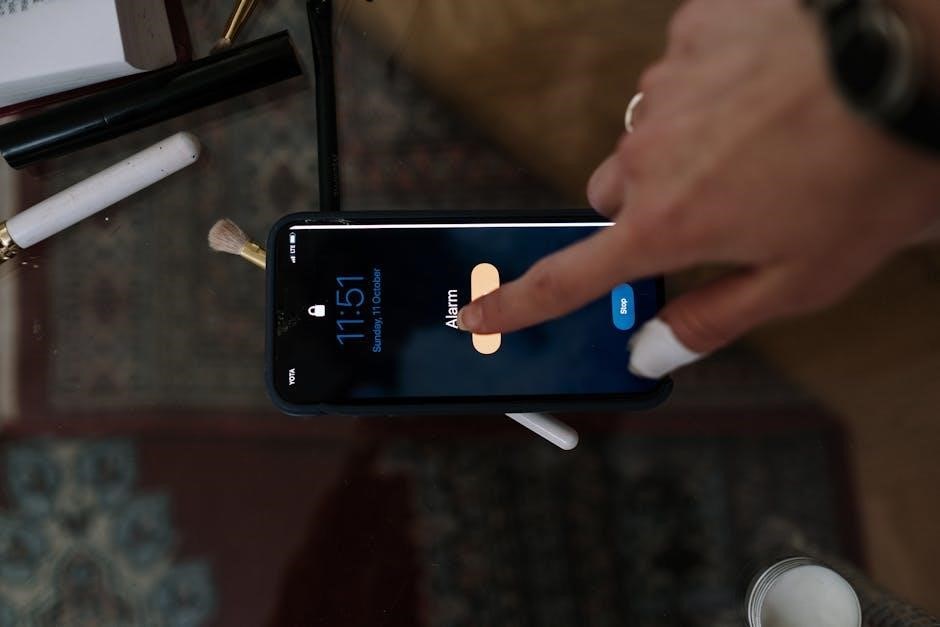
To set a one-time alarm, press the Alarm button until the display shows the one-time alarm option. Use the Up or Down buttons to select the desired date and time. Press Set to confirm. The alarm will activate for that specific date and time only. Ensure the alarm is turned on by checking the alarm icon on the display. The alarm will sound once at the set time and then deactivate automatically. You can turn it off or delete it after it goes off if no longer needed.
4.5 Customizing Alarm Volume and Tone
To personalize your wake-up experience, the Sharp Digital Alarm Clock allows you to adjust the alarm volume and choose from various tones. Press the “+” or “-” buttons to increase or decrease the volume to your preferred level. For tone selection, navigate to the alarm settings menu and scroll through the available options, which may include beep sounds, nature sounds, or FM radio. Select the tone that wakes you up most effectively and suits your preference. Adjusting these settings ensures a tailored alarm experience that meets your needs and helps you start your day refreshed.
Customizing Your Alarm Clock
Personalize your Sharp Digital Alarm Clock to suit your preferences. Adjust brightness, enable/disable snooze, set alarm duration, and customize tones for a tailored wake-up experience.
5.1 Adjusting the Display Brightness
Adjusting the display brightness on your Sharp Digital Alarm Clock is straightforward. Locate the dimmer button on the back or side of the clock. Press and hold it to cycle through brightness levels. Choose a setting that suits your room’s lighting conditions. For optimal comfort, set a lower brightness for nighttime use and a higher setting for daytime readability. Some models may also allow scheduling brightness adjustments automatically, ensuring the display adapts to your daily routine without manual intervention.
5;2 Enabling/Disabling the Snooze Function
The snooze function allows you to pause the alarm for a short period, giving you a few extra minutes of rest. To enable or disable this feature, press and hold the Snooze button until the indicator light toggles on or off. When enabled, the snooze duration is typically 5-10 minutes, depending on the model. Disabling the snooze function ensures the alarm will not pause, helping you wake up immediately; This feature can be adjusted in the settings menu for personalized preferences, ensuring your alarm experience is tailored to your needs.
5.3 Setting the Alarm Duration
Setting the alarm duration allows you to customize how long the alarm sounds before turning off. Press the Menu button and navigate to Alarm Settings. Use the + or ⸺ buttons to adjust the duration, typically ranging from 5 to 60 minutes. Once set, press Save to confirm. This feature is ideal for heavy sleepers or those who need extra time to wake up. Ensure the volume is set appropriately for the duration to be effective. Adjusting the duration can help create a more personalized wake-up experience.
5.4 Customizing the Alarm Tone
Customizing the alarm tone allows you to personalize your wake-up experience. The Sharp Digital Alarm Clock offers a variety of built-in tones, ranging from gentle melodies to alert beeps. To customize, navigate to the settings menu, select “Alarm Tone,” and choose from the available options. You can also adjust the tone’s volume to suit your preference. Some models may allow uploading custom tones via USB or app connectivity. Preview tones before saving to ensure the perfect start to your day. This feature ensures your alarm is both functional and enjoyable, tailored to your lifestyle and preferences.
Advanced Features
Explore advanced functionalities like USB charging, battery backup, and multiple alarms. These features enhance convenience, ensuring uninterrupted performance and personalized wake-up experiences tailored to your lifestyle needs.
6.1 Using the Built-In USB Port for Charging
The Sharp Digital Alarm Clock features a convenient built-in USB port, allowing you to charge your smartphone, tablet, or other USB-compatible devices. Simply plug your device into the USB port, located on the back or side of the clock, and it will begin charging. This feature is perfect for keeping your devices powered while maintaining a clutter-free bedside setup. Ensure you use the original charging cable for optimal performance and safety. The USB port operates independently of the alarm clock’s power status, making it a reliable charging solution day or night.

6.2 Understanding the Battery Backup Option
The Sharp Digital Alarm Clock features a battery backup option, ensuring uninterrupted functionality during power outages. This built-in system uses replaceable batteries to maintain the time, alarms, and settings. When the main power source is lost, the backup kicks in automatically, preserving all configured data. This feature is especially useful for maintaining reliability and convenience. Always use the recommended battery type for optimal performance and replace them periodically to ensure the backup system works when needed. This ensures your alarm clock remains functional and ready to use at all times.
6.3 Using the Dimmer Function
The Dimmer Function allows you to adjust the brightness of the display to suit your preferences. Press and hold the dimmer button on the back or side of the clock to cycle through brightness levels. This feature is especially useful for maintaining a comfortable sleep environment, as it reduces glare in dark rooms or provides clearer visibility in bright settings. Adjust the brightness to a level that minimizes eye strain and ensures the display remains easily readable. Some models may also offer automatic dimming based on ambient light conditions.

6.4 Setting Up Multiple Alarms
To set up multiple alarms on your Sharp Digital Alarm Clock, press the ALARM button to access the alarm settings. Use the navigation buttons to select the desired alarm slot (Alarm 1, Alarm 2, etc.). Set the time using the SET button and choose the days of the week the alarm should activate. Save your settings by pressing SET again. Repeat for additional alarms. You can customize each alarm’s volume and tone independently. The clock allows up to five alarms, ensuring flexibility for different schedules. Enable or disable alarms as needed for convenience.

Troubleshooting Common Issues
Resolve issues like power failures, incorrect time updates, or non-functioning alarms by checking power sources, adjusting settings, and ensuring proper display visibility for optimal performance.
7.1 The Alarm Clock Is Not Turning On
If the Sharp Digital Alarm Clock fails to turn on, first check the power source. Ensure the clock is properly plugged into a working outlet or that batteries are installed correctly. Verify that the power button is functioning and that no obstructions prevent it from turning on. If using batteries, try replacing them with fresh ones. If the issue persists, reset the device by unplugging it or removing batteries for 30 seconds. If none of these steps work, contact customer support for further assistance.

7.2 The Time Is Not Updating Correctly
If the time on your Sharp Digital Alarm Clock isn’t updating properly, check if the clock is powered correctly. Ensure the AC adapter is securely plugged in or replace the batteries if using battery backup. Verify that the time zone is set correctly. If connected to an atomic clock, ensure it’s within signal range. Reset the clock by powering it off and on again. If issues persist, refer to the manual or contact customer support for further assistance.
- Check power source and connections.
- Confirm time zone settings.
- Reset the clock if necessary.
7.3 The Alarm Is Not Going Off
If the alarm fails to go off, ensure the alarm is enabled and the volume is set appropriately. Check if the time is correct and the alarm is set for the right day. Verify that the snooze function isn’t interfering. If using a USB port, ensure the clock is properly powered. Reset the alarm or restart the device if necessary. If issues persist, refer to the troubleshooting guide or contact customer support for further assistance.
7.4 The Display Is Not Visible
If the display is not visible, ensure the brightness is adjusted to an optimal level. Check for dirt or grime on the screen and clean it gently with a soft cloth. Verify that the power source is stable—ensure the clock is properly plugged in or batteries are installed correctly. If using a dimmer function, adjust it to increase visibility. In low-light conditions, consider using a nightlight or placing the clock under a lamp. If issues persist, reset the clock or consult the user manual for further troubleshooting steps.

Maintenance and Care
Regular maintenance ensures your Sharp Digital Alarm Clock performs optimally. Clean the display gently, replace batteries as needed, and store it properly to extend its lifespan.
8.1 Cleaning the Display and Exterior
Regular cleaning ensures your Sharp Digital Alarm Clock remains functional and visually appealing. Use a soft, dry cloth to wipe the display and exterior surfaces. For stubborn marks, lightly dampen the cloth with water, but avoid harsh chemicals or electronic cleaners. Gently scrub the area, then dry thoroughly with a clean cloth to prevent water spots. Never spray liquids directly on the clock, as this could damage internal components. For the display, a microfiber cloth is ideal to prevent streaks and maintain clarity. Cleaning regularly will keep your alarm clock in pristine condition and ensure optimal performance.
8.2 Replacing the Batteries
To replace the batteries, first turn off the alarm clock. Open the battery compartment, usually located on the back. Remove the old batteries and insert new ones, ensuring correct polarity. Use alkaline batteries for optimal performance. Avoid mixing old and new batteries. Close the compartment securely. Turn the clock back on and test the alarm to ensure it functions properly. Remember to dispose of old batteries responsibly. For rechargeable options, follow the manufacturer’s charging instructions. Regular battery replacement ensures reliable operation and prevents data loss.
8.3 Updating the Firmware (if applicable)
To ensure your Sharp Digital Alarm Clock performs optimally, periodic firmware updates may be necessary. Check the current firmware version on the clock’s settings menu. Visit Sharp’s official website to download the latest update. Connect the clock to your computer using a USB cable, then follow the on-screen instructions to install the update. Once completed, restart the device to apply changes. Always refer to the user manual for specific guidance, as update procedures may vary. Regular updates help maintain functionality and performance.
8.4 Storing the Alarm Clock Properly
When not in use, store the Sharp Digital Alarm Clock in a cool, dry place away from direct sunlight. Turn off the alarm to conserve battery life. Use the original packaging or a protective cover to prevent dust and scratches. Avoid exposing the device to extreme temperatures or humidity. If storing for an extended period, remove batteries to prevent leakage. Keep the clock upright to maintain its display integrity. Ensure the USB port is unplugged to avoid damage. Store in a secure location to prevent accidental activation or damage.
9.1 Summary of Key Features and Benefits
The Sharp Digital Alarm Clock offers a blend of functionality, ease of use, and modern design, making it an excellent choice for enhancing your daily routine.
9.2 Final Tips for Optimal Use
Explore all features, set multiple alarms, and maintain proper care to ensure long-lasting performance and reliability.
9.3 Encouragement to Explore More Features
Discover additional settings and customization options to tailor the alarm clock to your preferences for a personalized experience.
The Sharp Digital Alarm Clock offers a blend of functionality and convenience, featuring multiple alarm options, customizable display settings, and a user-friendly interface. Its built-in USB port, battery backup, and dimmer function enhance versatility. With precise timekeeping and reliable performance, it ensures you start your day on schedule. The clock’s sleek design and advanced features make it a practical addition to any bedroom, providing both convenience and efficiency for everyday use.
- Place the clock at eye level to avoid straining your neck while viewing the display.
- Set alarms 7-9 days in advance to maintain a consistent sleep schedule.
- Experiment with different tones and volumes to find the most effective wake-up option for you.
- Regularly clean the display to ensure clarity and longevity of the screen.
- Explore all features, such as USB charging and dimmer settings, to maximize functionality.
Now that you’ve mastered the basics, take the time to explore more advanced features of your Sharp Digital Alarm Clock. Discover how customizable settings can enhance your daily routine. Experiment with different alarm tones, brightness levels, and snooze options to tailor the clock to your preferences. Don’t hesitate to try out less obvious functions, like the USB charging port or multiple alarm setups. The more you explore, the more you’ll appreciate the versatility and convenience this alarm clock offers. Keep experimenting and enjoy the full potential of your Sharp Digital Alarm Clock!